Scrap Paper Bookmarks: 3 Easy Styles from Leftover Paper
Step-by-step instructions for three bookmarks made from paper scraps and thin cardboard: a layered strip with a tassel, a folded corner pocket and a woven two-color strip.
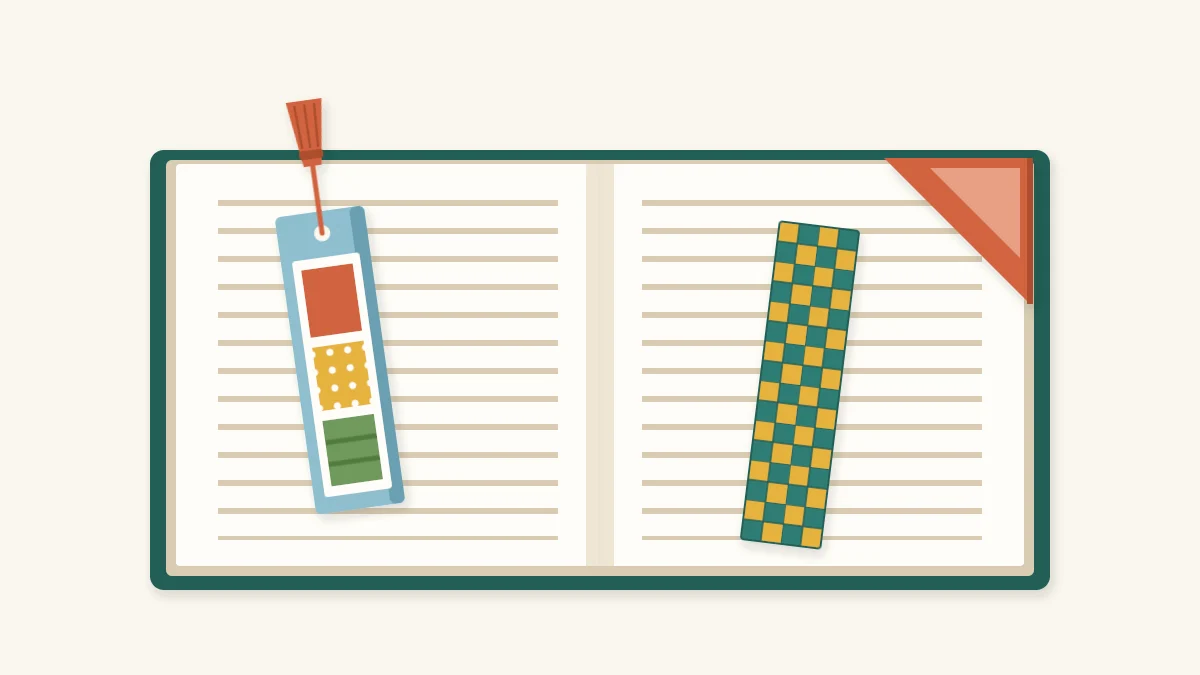
Tutorial at a glance
Materials
- Paper scraps: magazine pages, wrapping paper, old maps, envelope linings
- Cereal box card, about 2 x 7 in (5 x 18 cm) per layered bookmark
- 1 paper square, 4 x 4 in (10 x 10 cm), for the corner bookmark
- Yarn or narrow ribbon, about 8 in (20 cm)
- Glue stick or white glue
Scrap paper bookmarks are a good use for pieces too small for anything else: the last strip of wrapping paper, a torn map, the patterned lining of an envelope. A bookmark needs only a few square inches, so even an offcut the size of your palm is enough.
The three styles below use the same scraps in different ways. One is layered and stiff, one is folded with no glue at all, and one is woven from two colors. Each takes well under an hour.
What you need
- Paper scraps in several patterns and colors
- Cereal box card or other thin cardboard
- Yarn or narrow ribbon, about 8 in (20 cm), for a tassel
- Scissors, pencil and ruler
- Glue stick or white glue
- Hole punch
- A heavy book for pressing
Choose and prepare your scraps
Almost any clean, dry paper works, but each type behaves a little differently.
- Magazine pages: bright and plentiful, but thin. Best glued onto card.
- Wrapping paper: strong patterns in large repeats. Smooth out fold lines first.
- Old maps: fine detail that looks good at bookmark size, and usually sturdy paper.
- Envelope linings: small security patterns in blue or gray that work well as a quiet background.
Flatten creased pieces under a book for an hour before cutting. Sort what you have into two piles, patterned and plain, since most of these bookmarks look better with a mix of both. If you are new to working with household materials, the guide to recycled crafts for beginners explains how to pick a first project.
Style 1: layered strip with a tassel
This is the sturdiest of the three. The cereal box card gives it a firm back, and the scraps cover the printed side.
- Cut a strip of cereal box card 2 x 7 in (5 x 18 cm). Round the corners with scissors if you like.
- Cover the printed side with one background scrap, glued edge to edge. Trim any overhang flush with the card.
- Cut three or four smaller pieces in contrasting papers: a wide band, a narrow band and a small square or circle. Arrange them on the strip before gluing, overlapping some edges.
- Glue the pieces down one at a time, smoothing from the center outward so no air stays trapped.
- Cover the plain back with a single scrap for a finished look.
- Place the bookmark between two sheets of scrap paper and press it under a heavy book for about an hour while the glue dries.
- Punch a hole centered about 1/2 in (1.3 cm) from the top. Fold the yarn in half, push the folded loop through the hole, pass the two ends through the loop and pull snug.

Tip
A glue stick wrinkles thin magazine paper less than white glue does. If white glue is all you have, spread a very thin coat on the card, not on the paper.
Style 2: folded corner bookmark
A corner bookmark slips over the top corner of a page like a small pocket. It needs a square of paper and no glue. Slightly heavier paper, such as a map or a calendar page, holds the folds best.
- Cut a square with sides of 4 in (10 cm) and lay it pattern side down, turned so it looks like a diamond.
- Fold the bottom point up to meet the top point, making a triangle with the long edge nearest you.
- Fold the two side points up to the top point and crease firmly. The shape is now a small diamond.
- Open those two flaps again. Fold only the front layer of the top point down to the long edge, then tuck each side point into the pocket this creates and press all the folds flat.
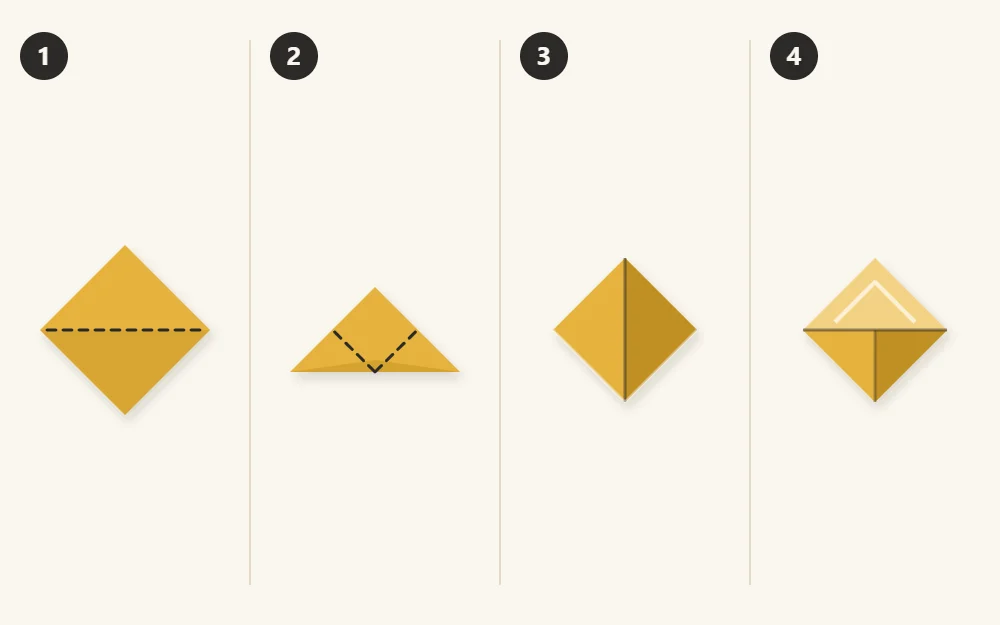
Run the back of a fingernail or the side of a pencil along each fold to sharpen it. If the flaps spring out, a small dab of glue stick inside the pocket holds them, though a well-creased fold usually stays put.
Style 3: woven strip bookmark
Weaving turns two plain papers into a checked pattern. Choose two colors with clear contrast, one for the base and one for the weaving strips.
- Cut a base rectangle 2 x 6 in (5 x 15 cm) from the sturdier paper.
- Rule a line 1/2 in (1.3 cm) in from each short end. Between those lines, cut four lengthwise slits spaced evenly, leaving both ends uncut so the base stays in one piece.
- Cut about 10 weaving strips from the second paper, each 2 in long and 3/8 in wide (5 x 1 cm).
- Weave the first strip across the base, over one bar and under the next. Slide it up against the uncut end.
- Weave the second strip the opposite way, under where the first went over. Continue alternating and pushing each strip close to the last until the base is full.
- Dot glue under the ends of each strip at both edges, trim anything that sticks out, and press under a book until dry.
For extra strength, glue the finished weaving onto a strip of cereal box card cut to the same size.
Finishing and pressing
Pressing matters more than any other step. Paper glued on one side curls as it dries, and a bookmark that will not lie flat is awkward to use. Leave glued bookmarks under a heavy book for at least an hour, with clean scrap paper on both sides to catch stray glue.
Check the edges once dry. Trim any lifted corner or re-glue it with a toothpick. To protect a layered bookmark that will get heavy use, brush on one thin coat of diluted white glue and let it dry fully before it goes into a book.
Watch out
Keep bookmarks thin. Thick layers, knots of ribbon or raised decorations can strain a book’s spine and dent its pages.
What to do with the leftovers
Bookmark making produces its own offcuts. Long tapered slivers from magazine pages are the right shape for rolling paper beads, and one bead threaded onto the tassel adds a small weight.
Larger pieces that survived, especially full magazine pages and map sections, can become magazine page envelopes. A handmade bookmark tucked into a matching envelope makes a simple gift to include with a book.
Frequently asked questions
What size should a paper bookmark be?
A strip about 2 in wide and 6 to 7 in long (5 x 15 to 18 cm) suits most paperbacks and hardcovers. Make it shorter for pocket-size books so the top does not stick out far enough to bend. A corner bookmark folded from a 4 in (10 cm) square fits nearly any page.
Why does my bookmark curl after gluing?
Wet glue makes paper swell on one side, and it pulls as it dries. Use less glue, cover both faces of the card so the pull is balanced, and press the bookmark under a heavy book between clean sheets of paper for at least an hour. Most curling flattens out with pressing.
Can I make these bookmarks without cardboard?
Yes. The corner bookmark uses only a paper square, and the woven strip works with two sturdy papers such as map or calendar pages. The layered strip needs some stiffness, but two or three sheets of heavier scrap paper glued together and pressed flat can stand in for the card.


