Jar Lanterns with LED Lights: Soft Decor from Glass Jars
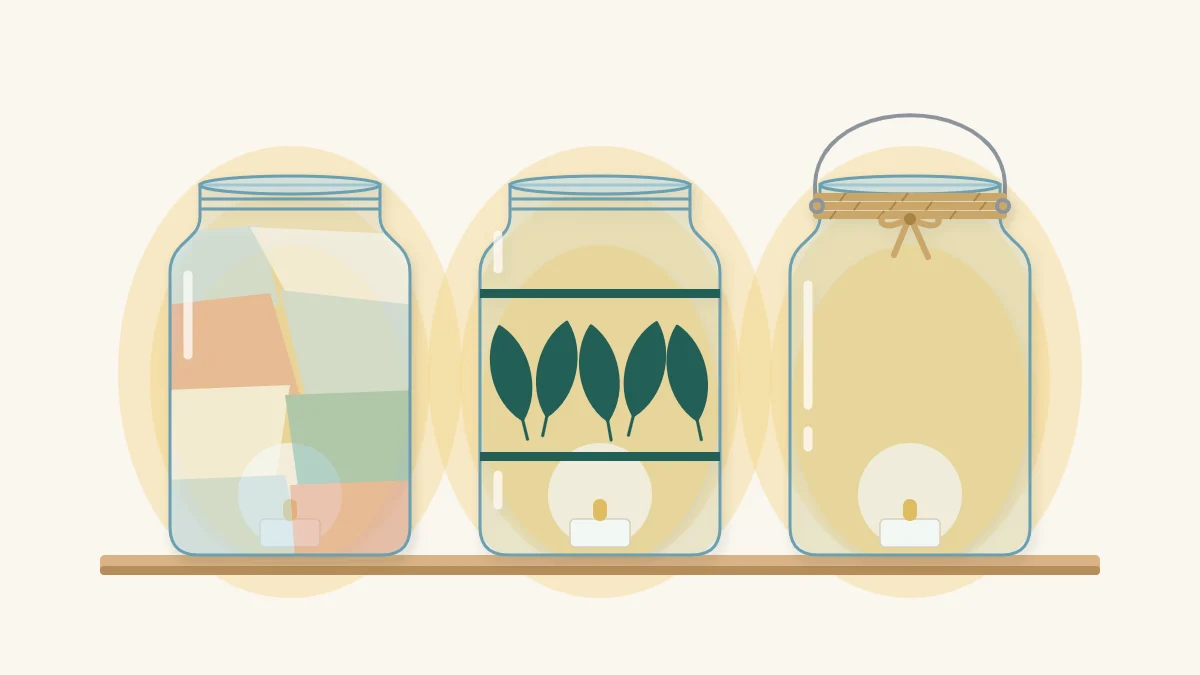
Three ways to decorate glass jars as lanterns lit by battery LED lights: a frosted tissue paper finish, a cut-paper silhouette band, and a twine-wrapped neck with a handle.
Tutorial at a glance
Materials
- Clean glass jars, labels removed
- Battery LED tea lights or battery LED string lights
- White or pale tissue paper
- Decoupage glue or thinned white (PVA) glue
- Dark scrap paper for silhouettes
- Twine or jute cord
- Craft wire, about 20 in (50 cm) per handle
Jar lanterns are one of the quickest ways to turn a few empty jars into something you will use: a soft light for a shelf, a dinner table or a covered porch. The glass is already the right shape, so all the work goes into how the light looks as it passes through.
Every lantern here is lit by battery LED lights. Paper, glue and twine are the decorations, and none of them belong near a flame, so candles are not part of this project at all.
What you need
- Clean glass jars, any size from a small jam jar up
- Battery LED tea lights or a short battery LED string light for each jar
- White or pale tissue paper
- Decoupage glue, or white (PVA) glue thinned with a little water
- Dark paper for silhouettes, such as black or navy scrap paper
- Twine or jute cord
- Craft wire, about 20 in (50 cm) per handle, and pliers
- Scissors, pencil, soft flat brush and a small dish
Prepare the jars
Choose jars that held food, with smooth sides and no chips or cracks. Wash them in warm soapy water, rinse and dry them completely. Glue will not grip a greasy or damp surface.
Take the labels off, including the sticky layer underneath, because any patch of residue shows as a dark blotch once the light is on. The steps for that are in the guide on how to remove labels from jars. For more on picking and cleaning jars, see the overview of glass jar crafts.
Choose the lights
Two kinds of battery light suit a jar, and they give different effects.
| Light | Effect | Good to know |
|---|---|---|
| Battery LED tea light | One warm glow at the base of the jar | Drops in and lifts out; the switch is underneath |
| Battery LED string light | Many small points of light through the whole jar | Needs a place for the battery pack |

Warm white LEDs look closest to lamplight. Cool white reads as bluish behind tissue paper.
Look 1: frosted tissue paper
Tissue paper turns clear glass into a soft, even shade that hides the light source and spreads its glow.
- Tear the tissue paper into pieces roughly 1 to 2 in (2.5 to 5 cm) across. Torn edges blend into each other better than cut ones.
- Pour a little glue into the dish. Brush a thin layer onto a section of the jar about the size of your palm.
- Lay a piece of tissue on the wet glue and brush gently over it from the center outward to flatten it. Overlap the next piece slightly.
- Work around and up the jar until the outside is covered to just below the threads of the neck.
- Brush one thin coat of glue over everything and stand the jar upside down to dry for about an hour, until it is clear and no longer tacky.

Tip
Wet tissue tears easily. Use a soft brush, a light touch and as few strokes as possible. Small wrinkles are part of the frosted look and soften once the light is on.
Look 2: paper silhouette band
A band of dark shapes around a jar shows up sharply against the light behind it. Leaves, simple houses, stars and tree outlines all work, as long as the shapes are bold.
- Measure around the jar with a strip of paper and mark where it overlaps. Cut a band of dark paper to that length plus 1/2 in (1.3 cm), and about 2 in (5 cm) tall.
- Draw a row of shapes on the back of the band, leaving a strip about 3/8 in (1 cm) deep along the bottom that joins them together.
- Cut around the tops of the shapes with scissors, keeping the bottom strip whole.
- Brush glue onto the back of the band and wrap it around the lower half of the jar, pressing it flat. Overlap the ends at the back.
The band works on clear glass and looks even better over a dry layer of tissue from the first look, where the silhouettes stand out against an even glow. For a solid block of color instead of a translucent one, the method for painted jar vases shows how to build opaque coats, though a fully painted jar lets very little light through.
Look 3: twine neck and a handle
This look leaves the glass clear and suits LED string lights, since the points of light stay visible.
- Put a dot of glue just below the threads of the neck and press the end of the twine into it. Wrap the twine around the neck eight to ten times, keeping the turns snug against each other, then glue down the end.
- For a wire handle, wrap the middle of the wire once around the neck, just under the lowest ridge of the threads, and twist it tight with pliers.
- Bring the two free ends up over the mouth of the jar to form an arch, and twist each end around the neck wire on opposite sides.
- Bend the cut ends inward with the pliers so no sharp tip sticks out.
Lift a lantern by its handle only once you have tested that the neck wire cannot slip over the threads, and carry heavier jars with a hand underneath.
Add the lights and place the lanterns
Switch on an LED tea light and set it flat on the bottom of the jar. For a string light, feed the wire in loosely so the bulbs spread through the jar instead of bunching at the base.
Keep the battery pack where you can reach the switch. It can rest on top of the coiled lights, sit in the neck of the jar or be taped inside the lid with double-sided tape. Leave the lid off or loose if the pack does not fit under it.
Watch out
Use battery LED lights only and never put a candle or any flame inside a decorated jar. Many LED tea lights run on small coin batteries, so keep spare batteries and open lights away from young children and pets.
These lanterns are for indoor use or a sheltered spot such as a covered porch. Rain softens the paper and glue, and most small battery packs are not made to get wet. Bring them inside after an evening outdoors, and switch the lights off when you are done to save the batteries.
Frequently asked questions
Can I use a real candle instead of an LED light in a jar lantern?
No. These lanterns are covered in paper, glue and twine, and they are designed for battery LED lights only. An LED tea light gives a similar warm glow, switches on and off underneath, and can sit inside the jar with the decorations around it.
Which LED lights work best in a jar?
A battery LED tea light gives one soft glow and suits tissue-covered jars, where the paper spreads the light. A short battery LED string light fills the jar with small points and suits clear glass. Warm white looks closest to lamplight. Check that the battery pack fits through the jar mouth.
Can jar lanterns be used outdoors?
They suit a covered porch or a table on a dry evening, but they should not be left out. Rain and dew soften tissue paper and glue, and small battery packs are generally not built to get wet. Bring the lanterns indoors afterward and store them somewhere dry.