Rolled Magazine Coasters: How to Coil Paper Strips into a Mat
Fold magazine pages into narrow strips, wind them into a tight flat disc and seal it. Includes color planning by page edge, how to keep the coil level, and care for the finished coaster.

Tutorial at a glance
Materials
- 15 to 20 magazine pages per coaster
- White (PVA) glue or tacky glue
- Water-based sealer, or white glue thinned with water
- Wax paper or parchment paper to protect the table
- Rubber band or clothespins
- Felt circle for the underside (optional)
Magazine coasters are made from one material and one motion: fold a page into a strip, then wind the strip around itself. Repeat until the coil is the size of a coaster. The colors printed on the page end up as fine stripes running around the disc.
The technique is simple, but it rewards a steady hand. A tight, flat coil looks crisp and sits level under a glass, so most of this tutorial is about keeping it that way.
What you need
- Magazine pages, about 15 to 20 per coaster
- Scissors
- White (PVA) glue or tacky glue
- A water-based sealer, or white glue thinned with a little water
- A flat brush and a small dish
- Clothespins or a rubber band
- A sheet of wax paper or parchment paper to work on
Glossy pages and thin matte pages both work. Thick cover stock is hard to fold neatly, so set covers aside.
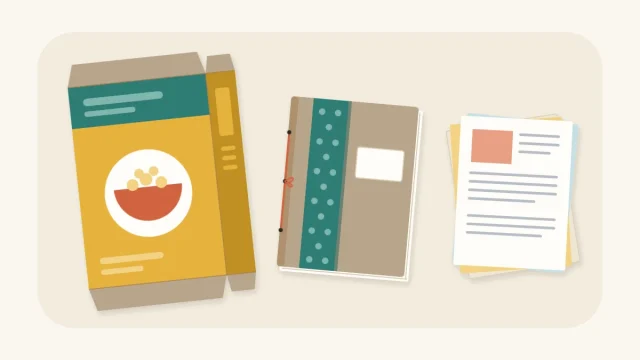
Plan your colors by the page edge
Only the folded edge of each strip shows in the finished coaster. The picture in the middle of the page disappears inside the folds, so judge a page by the color along its long sides, not by its image.
Sort the pages into loose color groups before you start. Three approaches work well:
- Mixed. Take pages as they come for a lively, speckled look.
- Banded. Use five or six strips of one color, then switch, to build rings like a target.
- Tonal. Stay within one color family, such as blues and teals, for a calmer result.
If you have made paper beads from magazine pages, the idea is the same: the visible color comes from the edge of the paper.
Fold the strips
Prepare a pile of strips before you coil. Stopping to fold in the middle makes it hard to keep tension on the disc.
- Tear or cut the pages cleanly out of the magazine.
- Cut each page in half lengthwise, so you have two long pieces about 4 in (10 cm) wide.
- Fold one piece in half along its length and crease it firmly with a fingernail or the back of a spoon.
- Fold it in half lengthwise again, and then a third time. You now have a flat strip about 1/2 in (1.3 cm) wide.
- Repeat with the remaining pieces, keeping the widths as even as you can.
Even width matters more than anything else at this stage. A strip that is wider than its neighbors will stand proud of the surface and make the coaster rock.
Coil the disc
- Put a thin line of glue along one strip. Starting at one end, roll it as tightly as you can into a small spiral, with the folded edges facing up and down.
- Hold the end for about a minute until the glue grabs.
- To join a new strip, glue its first 1 in (2.5 cm) over the tail of the last one, overlapping so the join stays slim.
- Run a thin line of glue along the new strip and keep winding, pulling gently so each turn sits snug against the one before.
- Every few strips, lay the coil on the table and press it flat with your palm.
- Stop when the disc is about 4 in (10 cm) across. Glue the final end down well and clamp it with a clothespin or a rubber band around the rim.
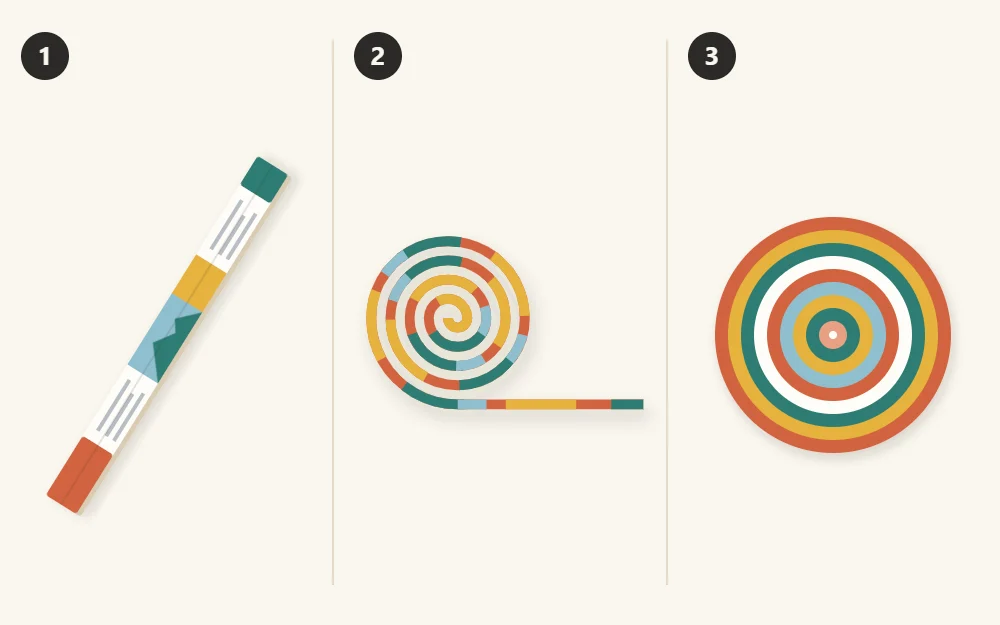
Use glue sparingly. A thin line holds the turns together; a thick one squeezes out, smears the print and takes far longer to dry. For more on how white glue and tacky glue behave on paper, see the guide to the best glue for recycled crafts.
Tip
Stagger the joins. If each new strip starts at a different point around the coil, the small bumps where strips overlap spread out and the disc stays round.
Keep the coil flat
A coil wants to dome in the middle, a little like a shallow cone. Two habits prevent it.
First, wind on the table, not in the air. Once the disc is wider than a coin, keep it lying on the wax paper and turn it like a wheel while you feed the strip onto the edge.
Second, press as you go. Any turn that has crept up gets pushed back level while the glue is still soft.
When the coil is finished, lay it between two sheets of wax paper and set a heavy book on top. Leave it for several hours, or overnight, so it dries flat.
Seal the coaster
Unsealed paper marks as soon as a damp glass touches it. A few coats of sealer bind the edges and give the surface some resistance to moisture.
Use a water-based sealer, or mix your own by stirring roughly two parts white glue with one part water in a small dish.
- Brush a thin coat over the top and around the rim, working the brush into the grooves between turns.
- Let it dry for about an hour, until clear and no longer tacky.
- Turn the coaster over and coat the other side. Let it dry.
- Repeat for two or three coats per side.

After the last coat, leave the coaster for a full day before use. Sealer that feels dry to the touch can still be soft underneath, and a glass set down too early may stick.
Use and care
Be realistic about what a paper coaster can do. A sealed one handles the ring of moisture from a cold glass, and you can wipe it with a slightly damp cloth.
Watch out
Do not soak a paper coaster or leave it sitting in a puddle. Water that gets past the sealer swells the paper and loosens the coil. Very hot mugs can also soften some sealers and leave a mark.
If the surface dulls over time, brush on one fresh coat of sealer and let it dry for a day.
Sets, sizes and gifts
Four coasters make a set. Building them from the same color groups, in a different order each time, ties the set together without making the pieces identical.
The same coil scales up. Keep winding to about 8 in (20 cm) and you have a mat for a plant pot or a vase; glue a circle of felt underneath for grip.
A stack of four tied with twine makes a neat small present. For ways to wrap it using paper and fabric you already have, look through these recycled gift wrap ideas.
Frequently asked questions
How many magazine pages does one coaster take?
Plan on roughly 15 to 20 pages for a coaster about 4 inches (10 cm) across, since each page is cut in half and gives two strips. The exact number depends on the paper thickness and how tightly you wind, so fold a few extra strips before you begin coiling.
Why is my coiled coaster turning into a cone shape?
The turns are creeping upward as you wind. Lay the disc flat on the table, push the raised turns back level while the glue is soft, and keep winding with the coil lying down. Drying the finished disc under a heavy book, between sheets of wax paper, also helps.
Can paper coasters get wet?
A sealed paper coaster copes with the damp ring left by a cold glass and can be wiped with a slightly damp cloth. It should not be soaked, rinsed under a tap or left in standing water, because moisture that passes the sealer swells the paper and loosens the coil.