Recycled Christmas Ornaments: Paper, Cardboard and Jar Lid Ideas
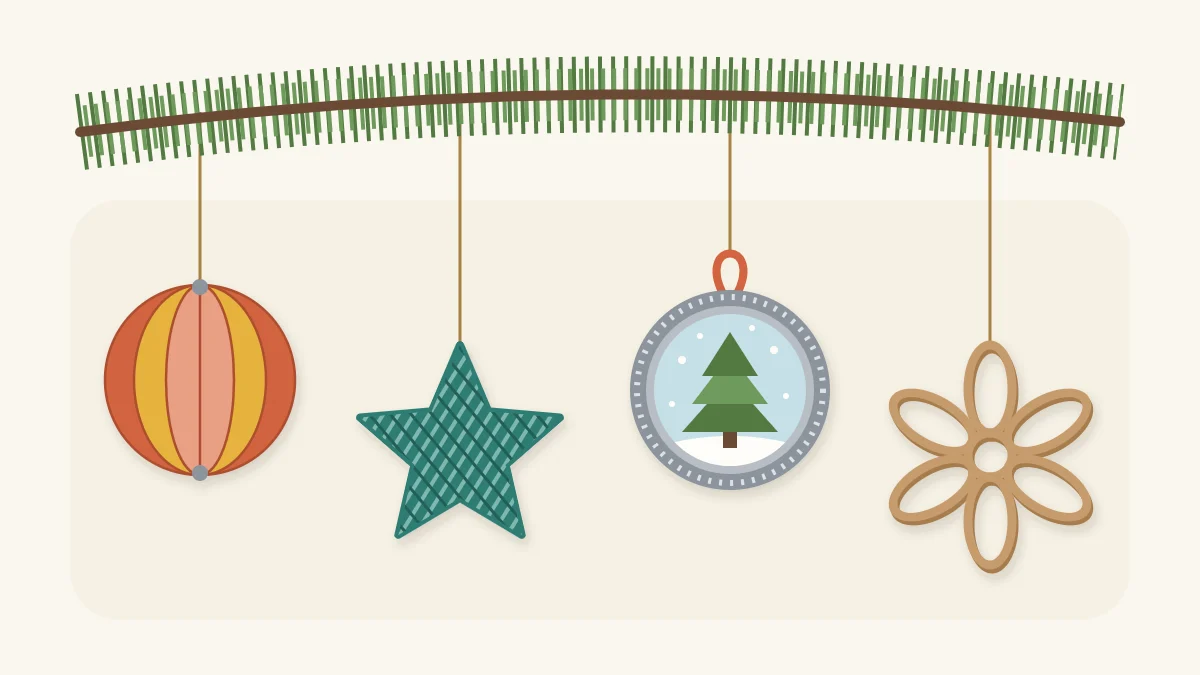
Four lightweight ornaments from everyday materials: a magazine-strip ball, a yarn-wrapped cardboard star, a jar lid frame with a paper tree and a paper tube snowflake, plus hanging and storage notes.
Tutorial at a glance
Materials
- Magazine pages with strong color
- Cardboard scrap, about 4 x 4 in (10 x 10 cm) per star
- Yarn or twine
- Metal jar lids, washed and dried
- 1 clean, dry paper tube per snowflake
- Scrap paper in green, white and brown
- Thread or narrow ribbon for hanging loops
Recycled Christmas ornaments are a good match for the materials that pile up in December: magazines, delivery boxes, jar lids and paper tubes. All four are light enough to hang on a branch and easy to shape with scissors and glue.
Here are four ornaments, one from each material. Each takes well under an hour of hands-on time, and they look best made in small batches so the tree has repeats of the same shape.
What you need
- Magazine pages with strong color
- Corrugated cardboard or cereal box card for the star shapes
- Yarn or twine
- Metal jar lids from food jars, washed and dried
- Clean, dry paper tubes
- Scrap paper in green, white or brown for the lid scene
- White (PVA) glue or tacky glue; a low-temperature glue gun is optional
- Scissors, ruler, pencil, clothespins, and thread, twine or narrow ribbon for loops
Paper to paper, yarn to cardboard and paper to metal each hold best with a different adhesive. The guide to the best glue for recycled crafts matches glue types to surfaces if a joint keeps coming apart.
Prepare the materials
Wash jar lids in warm soapy water, rinse and dry them completely, including the groove under the rim. Run a finger carefully around the edge; skip any lid that is bent, rusty or sharp.
Use only tubes that are clean and dry. Flatten them under a book for an hour so they are easier to slice. Tear out magazine pages along the spine and trim the ragged edge. Cover the table with scrap paper, since glue will drip.
Ornament 1: magazine-strip ball
Strips of magazine paper fastened at the top and bottom fan out into a sphere.
- Cut 8 strips, each about 1/2 in wide and 6 in long (1.3 x 15 cm). Thin pages hold their curve better folded double.
- Stack the strips, colored side out, and punch or pierce a hole about 1/4 in (6 mm) from each end.
- Tie a large knot in a length of thread and pass it up through the bottom holes, then through the top holes.
- Push the top of the stack down the thread until the strips bow outward. Knot the thread just above the top to lock the curve.
- Fan the strips evenly into a ball and tie the remaining thread into a hanging loop.
A rolled paper bead threaded on below the bottom knot makes a tidy finishing detail; the method is in how to make paper beads from magazine pages.
Ornament 2: yarn-wrapped cardboard star
Wrapping hides the cardboard completely, so printed or scuffed box card is fine.
- Draw a five-point star about 3 in (7.5 cm) across on cardboard and cut it out. A cookie cutter makes a quick template. An adult does any craft knife cutting.
- Glue the end of the yarn to the back of the star and let it grip for a minute.
- Wrap the yarn across the star from the notch between two points to the opposite side, turning the star a little with each wrap so the strands cross in the center.
- Keep wrapping, pulling snugly without bending the card, until the cardboard is covered.
- Cut the yarn, glue the end on the back, and tie a separate piece through the top wraps as a hanging loop.
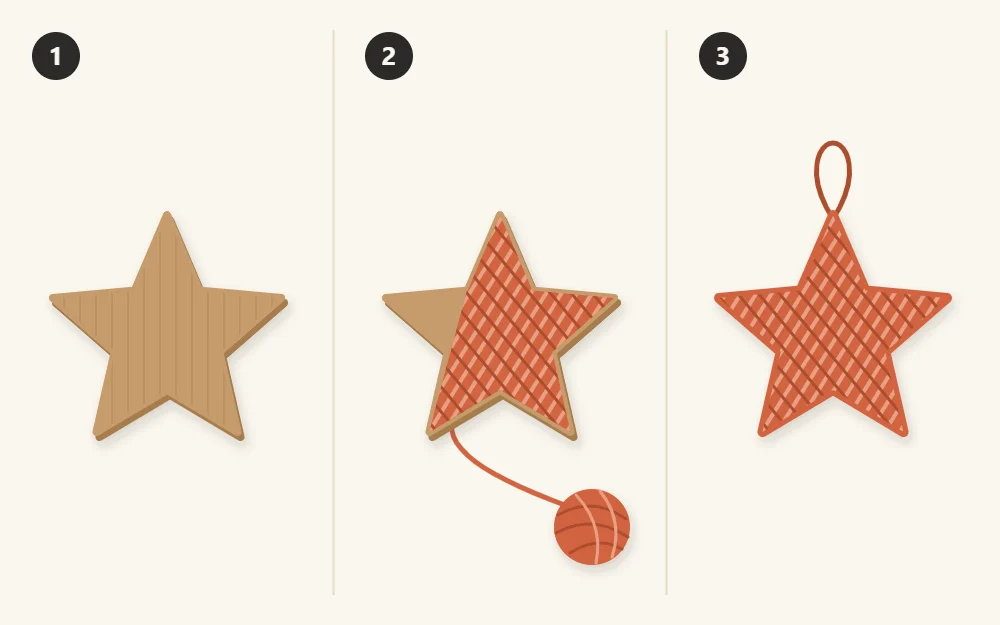
Trees, circles and simple mitten shapes wrap the same way. Shapes with notches or points hold the yarn in place; smooth ovals let it slide off.
Ornament 3: jar lid frame
The raised rim of a jar lid makes a ready-made round frame for a small paper scene.
- Trace the lid on plain or patterned paper, cut the circle slightly inside the line and glue it into the lid as a background.
- Cut a small tree from green paper: a tall triangle, or three stacked triangles. Add a narrow brown trunk.
- Glue the tree to the background. For a little depth, mount it on a tiny square of cardboard first.
- Cut about 6 in (15 cm) of ribbon, fold it into a loop and glue both ends to the top of the lid’s outer rim. Tacky glue or low-temperature hot glue grips metal better than white glue.
- Leave the lid flat until the glue has set, roughly an hour for tacky glue.

Ornament 4: paper tube snowflake
- Flatten a paper tube and mark it every 1/2 in (1.3 cm). Cut along the marks with scissors to make rings; you need 12 for one snowflake.
- Pinch each ring so it stays in a pointed oval.
- Glue 6 ovals together at one tip each to form a flower shape. Hold the center with a clothespin while it dries.
- Glue the remaining 6 ovals between the outer tips of the first six, one in each gap, pointing outward.
- When dry, paint the snowflake white with acrylic craft paint, or leave it brown. Tie thread through one outer oval to hang it.
Loops, weight and where to hang them
Lighter ornaments sit better on a branch. If a branch droops, move the ornament closer to the trunk or switch to a thinner cardboard next time.
Thread is nearly invisible and suits the paper ball and snowflake. Twine and ribbon are easier for small hands to hook over a branch. Make every loop about 3 in (7.5 cm) long when folded so it fits over thicker branches.
The same four shapes also work off the tree: tied to a gift, hung in a window, or strung between the knotted strips of a fabric scrap garland.
Watch out
These ornaments include thread, yarn and small glued pieces. Hang them out of reach of young children and pets, and take down any ornament that starts to come apart. Keep paper ornaments from resting directly against light bulbs.
Storing them for next year
Paper and cardboard ornaments last when they are kept flat, dry and uncrushed.
- Lay stars and jar lid frames in a shallow box in single layers, with a sheet of paper between layers.
- Paper balls can be flattened: loosen the top knot, let the strips straighten and store them like a stack of strips. Re-knot next year.
- Give snowflakes their own small box so the points do not bend.
- Store the box somewhere dry. Damp air softens cardboard and loosens glue.
Frequently asked questions
What glue holds a ribbon loop on a metal jar lid?
Tacky glue or a low-temperature glue gun grips smooth metal better than ordinary white glue, which can peel off once dry. Lightly roughening the spot with fine sandpaper first gives the adhesive more to hold. Let the lid lie flat until the glue has fully set before hanging it.
How do you store paper ornaments so they do not get crushed?
Keep them in a shallow, rigid box in single layers separated by sheets of paper, and store the box somewhere dry. Flat ornaments such as stars and lid frames stack well. Give fragile shapes like tube snowflakes a small box of their own so their points stay straight.
Can children make these ornaments?
Children can do most of the wrapping, gluing and paper cutting with supervision, and the yarn star is a good place to start. An adult handles any craft knife or glue gun steps. Because the finished ornaments include thread and small pieces, hang them out of reach of very young children.
